Our goal for this tutorial is to deploy our first pod within Kubernetes. We’re going to cover every step on how to write up the YAML file for deployment, which commands to issue to see the current state of our environment and the pod, and how to see the contents of what’s inside of our pod.
Prerequisites
- A Local installation of Kubernetes. You may certainly use a cloud deployment, but you may run into additional challenges when it comes to accessing those pods, services, etc. Refer to the cloud provider documentation if you’re going that route.
- An installation of a terminal software. On Linux and MacOS, you’ll find these out of the box; for Windows, you can use PowerShell or the Terminal feature in VSCode, which we will be using here.
- A basic understanding of command line / Terminal instructions. We’ll cover what you need, but it’s important for you to understand how to navigate files, how to see what’s running in your cluster (for troubleshooting purposes), etc.
- A basic understanding of YAML Files. We've written a tutorial on this topic in case you need to get up to speed - YAML File Format
Getting Started - Kubernetes Pod Fundamentals
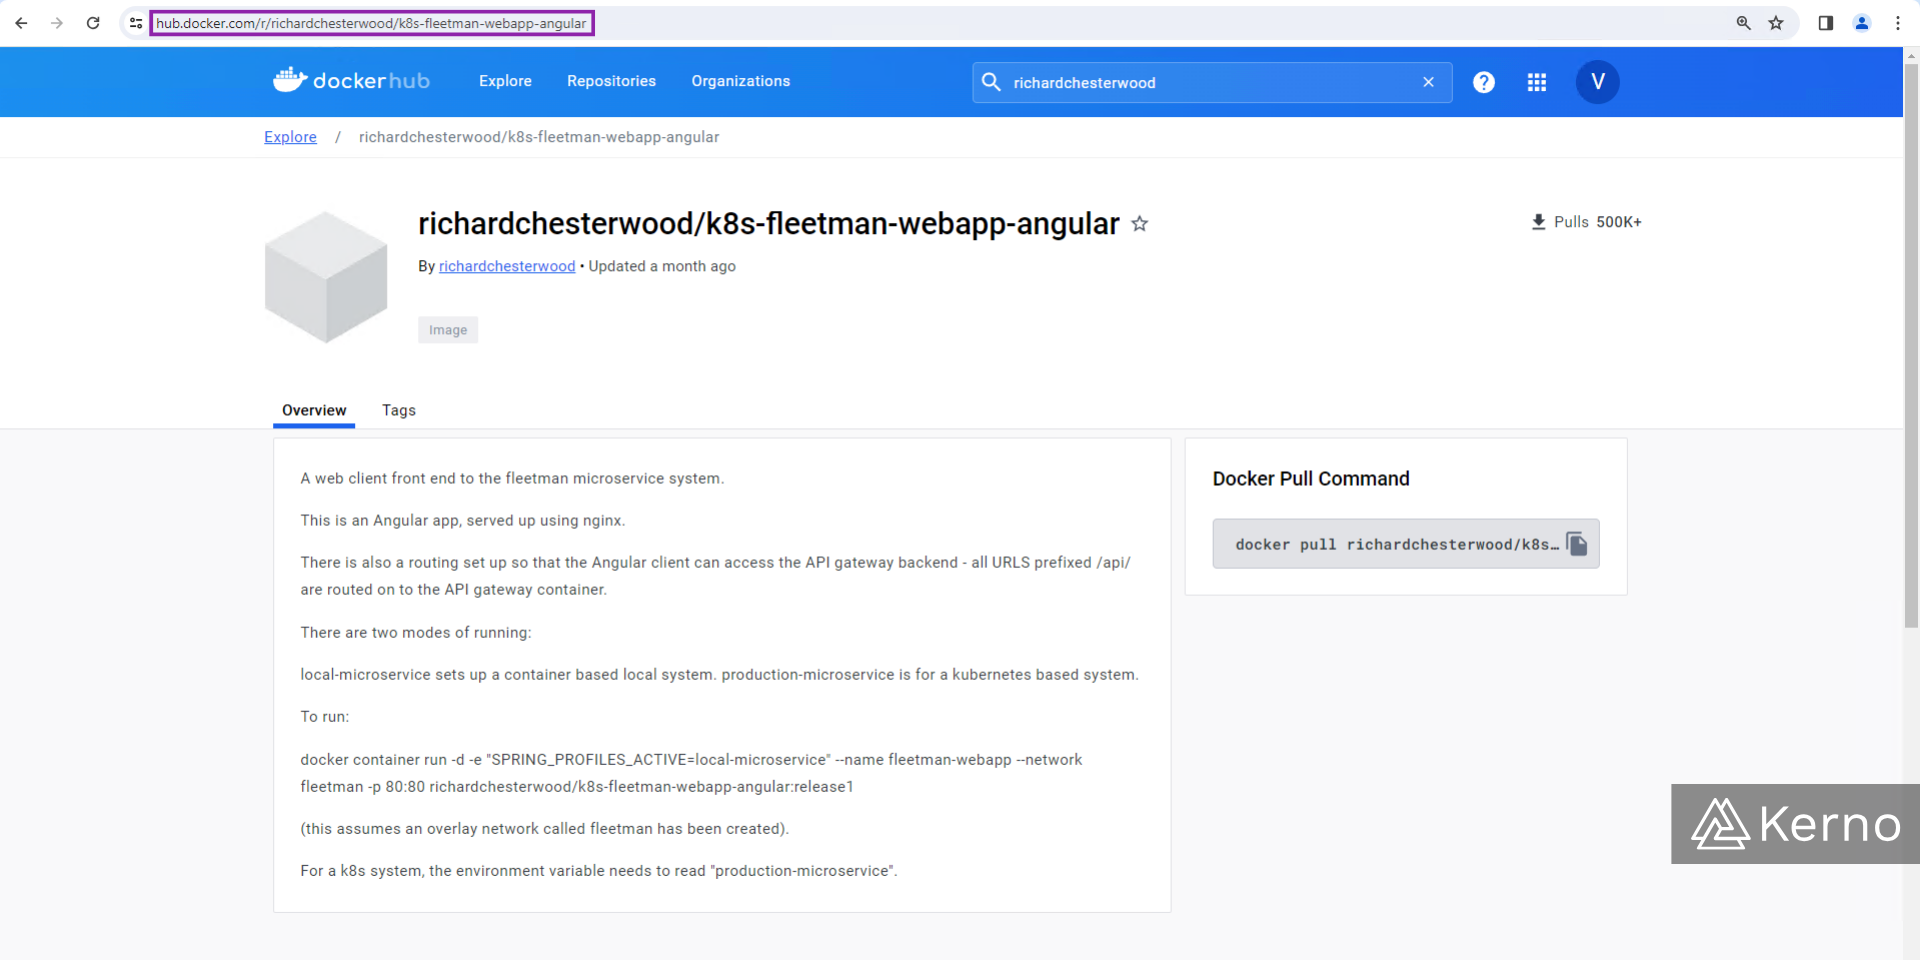
In Kubernetes, pods can run a variety of applications or microservices. In this tutorial, our focus isn’t going to be on what goes inside of the pod, as it will be on how to deploy a basic application into a pod. Based on that, we can utilize an example application that has been created by someone else and made public on DockerHub. If you’re unfamiliar with DockerHub, it’s a service allowing you and other users to upload their images and use them directly in your deployments. This is a separate topic as DockerHub comes with a lot of functionality beyond what we’ll be covering here. That being said, let’s take a look at the page of the service we’ll be deploying. To follow along, navigate to https://hub.docker.com/r/richardchesterwood/k8s-fleetman-webapp-angular

As you may have noticed in the Overview section of the page, it’s an Angular based application that servers a basic front-end to the user via nginx. Without getting too deep into the details, what we’re trying to accomplish here is deploying this code and seeing the HTML code that is delivered from the services that run on the pod in Kubernetes.
Before we deploy anything, let’s ensure that we’re all on the same page.
Step 1 - Make sure that your minikube service is running by issuing the following command:

Note that the response you’re likely to receive from your Minikube instance differs from what you see above. We’ve got a deployment of 1 Control Plane container with 2 Worker containers running. That being said, you should be all set if you have a variation of “Running” indicators.
Getting Started - Setting Up a YAML File for a Kubernetes Pod
We’re now ready to build the file to allow us to deploy a pod onto the cluster. Assets that run within Kubernetes are specified via YAML files. We’ve released a long guide on how to work with YAML if you’re unfamiliar with it — Writing and Using YAML Files. If you’re using VSCode, open a folder in which you’d like to store these files and issue the following command:
You should have a new blank file in your directory.
How to Specify Pods for Kubernetes?
An empty file called “myfirstpod” isn’t going to tell our cluster to deploy a pod. We need to write out the specifications as follows:
Let’s understand what the code above does!
Line 1 - apiVersion: v1
Kubernetes uses a specification of OpenAPI and currently has 3 major revisions. For our simple application, the older revision is going to be just fine; you can see what has been changed and which features are available in the latest versions on the official Kubernetes specification.
Line 2 - kind: Pod
You can deploy a variety of different services and components on Kubernetes; in this case, we need to specify that the kind of deployment we’re looking to make is a Pod.
Line 3, 4 - metadata:, name: myfirstapp
Each pod and component running on Kubernetes must be given a unique identifier. In this case, we’re going to call our pod “myfirstapp.” Note that you’ll need to refer to it as such in the following sections; ensure that you’re using the reference you create at this stage.
Line 5, 6, 7 - spec:, containers:, - name: myfirstapp
We’re specifying that our app will live inside of a container under the same name as above.
Line 8 - image: richardchesterwood/k8s-fleetman-webapp-angular:release0
On this line, we’re specifying where to pull the image for our pod from. Notice that we’ve also made the mention of “release0” which is the first version of this image. You can view all the releases including the first one by navigating into the “Tags” section as shown in the figure above. As briefly mentioned previously, DockerHub can keep track of different image versions and allow users to deploy whichever version they specify in their files. It’s common to see either a version or “latest” as the tag to pull whichever version is the latest. Remember that this could break other services if substantial changes have been made and no precautions have been taken to accommodate those changes before deployment.
Running a Pod in Kubernetes
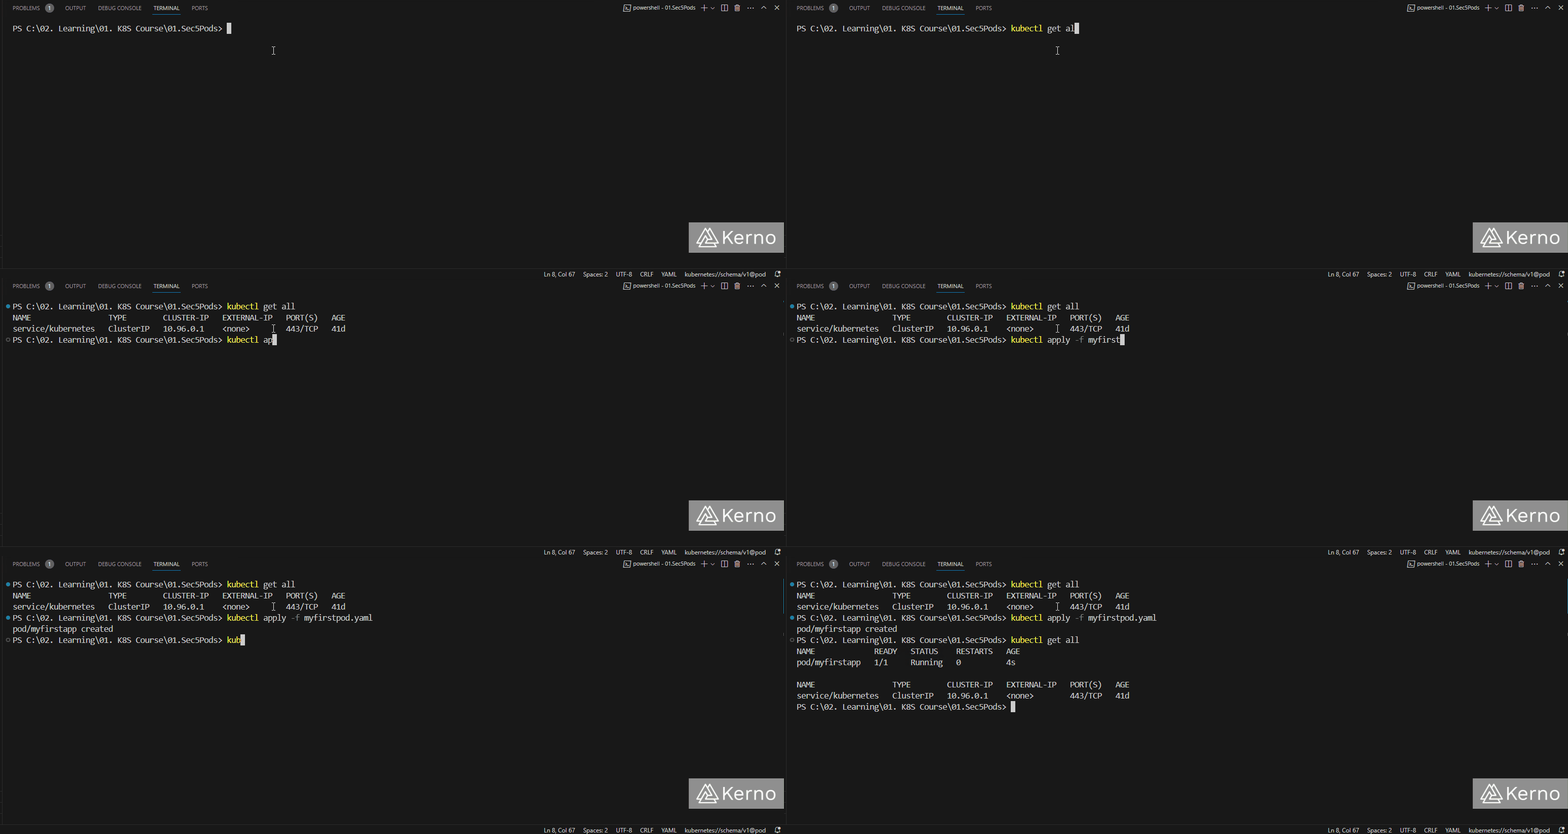
Let’s start by verifying what’s currently running in our cluster by issuing the following command:
If you’re on a new machine, you should only see the “service/kubernetes” service running. It’s responsible for the Kubernetes engine functions.
To deploy our pod via the YAML file, we’ll issue the following command:
Notice that the command isn’t to create a pod. In Kubernetes, you issue commands to import a configuration file that is parsed by the engine which then corresponds with the appropriate services that deploy what has been specified. Therefore, the command just “applies” the “-f” (file) that we’ve created!
At this point, you can once again issue the “get all” command to see the status of the pod. As mentioned above, it’s not going to happen instantaneously; a few steps will need to be completed before the pod status is set to running. The “longest” step, in this case, will be downloading the files from the DockerHub location we’ve specified.

You’ll notice that we have a new entry after we’ve added the YAML file to Kubernetes - pod/myfirstapp with a state of “Running.”
Note - if you’re getting errors at this stage, it’s due to one of two things - 1. There’s a problem with your minikube instance (it’s either not running, doesn’t have enough ressources, or is compatible with the commands you’re using (unlikely)). 2. There’s a syntax problem with your YAML file - ensure that you’ve indented the text as we’ve specified and the items are properly capitalized. For example, Kubernetes will throw an error if “Pod” is typed as “pod” or “pods.”
Connecting to a Pod in Kubernetes
Now that we’ve deployed the services for a web application into a pod, how can we view the contents? It turns out that this isn’t as easy of a process as one might expect. For security reasons, pods aren’t natively exposed to the outside world; the networking is done within the cluster.
To get the IP address of your minikube cluster, you can issue the following command:
If open your browser and navigate to the IP address of your cluster, you’ll notice that there’s nothing there. Although we’re not able to directly access the contents of our pod, we can take steps in figuring out what we need to do so. Let’s first issue a command that will provide us with additional information about the pod:

You’ll find a few interesting items on the response you receive from running this instruction. At this point, what’s interesting is the set of states outlined at the bottom, under the Events section. Notice that the pod has been successfully deployed to the cluster (in this example it was deployed onto “minikube-m01”) and it was started soon afterwards.
Accessing a Pod in Kubernetes Via Terminal
A container / pod is nothing more than an underlying “virtual machine.” It’s not quite a virtual machine but has many similar characteristics. In either case, it’s possible to issue Linux commands directed toward our pod by using the exec modifier. Here’s how we can view the directory of files inside the pod from the Terminal:

We can also access the pod via SSH to see the contents, modify them, or to simply understand better what’s going on inside of our pod. Here’s the command for that purpose:
Now that we’re inside of our pod, we can run a set of commands to view what is being served on localhost:80. Keep in mind that if you’ve used a different application for your deployment, these commands may not yield the same results. These are specific to the application running on port 80.
This command will download the html file that is being presented at that specific IP/port.
This command will output the text from an html file.

At this point, we haven’t quite accessed the application via a browser. However, we did access the pod via a text-based localhost:80 command and retrieved what was, in fact, being served via the application. We’ve displayed the contents of the HTML code on our terminal, which gives us confidence that the application is servicing the right information to a user that would be connecting to the pod.
Conclusion on Running Pods in Kubernetes
As you’ve experienced in this tutorial, it’s quite easy to get going in running pods on your local Kubernetes cluster. The key is to verify the state of the cluster, create a valid YAML file that specifies the contents of the pod, deploy the YAML file to the Kubernetes engine, and be able to navigate the contents of a pod within the cluster using a few different commands. If you have any questions about the process or believe that there’s a better way to get this done, don’t hesitate to reach out!
