As some of you may know, I’ve been doing a lot of server related work in the last few months. It is my goal to document some of the repeated tasks I’ve done so that I could go back to my own set of instructions, but also so that others could benefit from the steps I took that may have been different from the tutorials I found or followed.
In this tutorial, we’re going to walk through the required steps to set an IP address for a Ubuntu server Virtual Machine (VM). My goal with some of my virtual machines was to create two separate static interfaces. One of them is used to connect to the open network and access the web via my Internet Service Provider (ISP) router / modem, and the other will be used to access some hardware on a private network. Note that the second connection can be just a port into another VLAN that isn’t bridged from the one that has access to the internet.
Prerequisites
It’s important that you understand the setup I have as it might be different in your instance. Note that although I’ll be sharing the screenshots from Proxmox which is a hypervisor, the steps of setting up different IP addresses should apply to a standalone Linux installation; you’ll simply not need to bridge the network adapters.
Hardware Overview
I’m running a Dell PowerEdge R730xd server with the following specifications:
- 72 x Intel(R) Xeon(R) CPU E5-2699 v3 @ 2.30GHz (2 Sockets)
- 128GB of RAM
- 6TB of HDD Storage
- NIC - 4x RJ45 1Gbps
Software Overview - Hypervisor
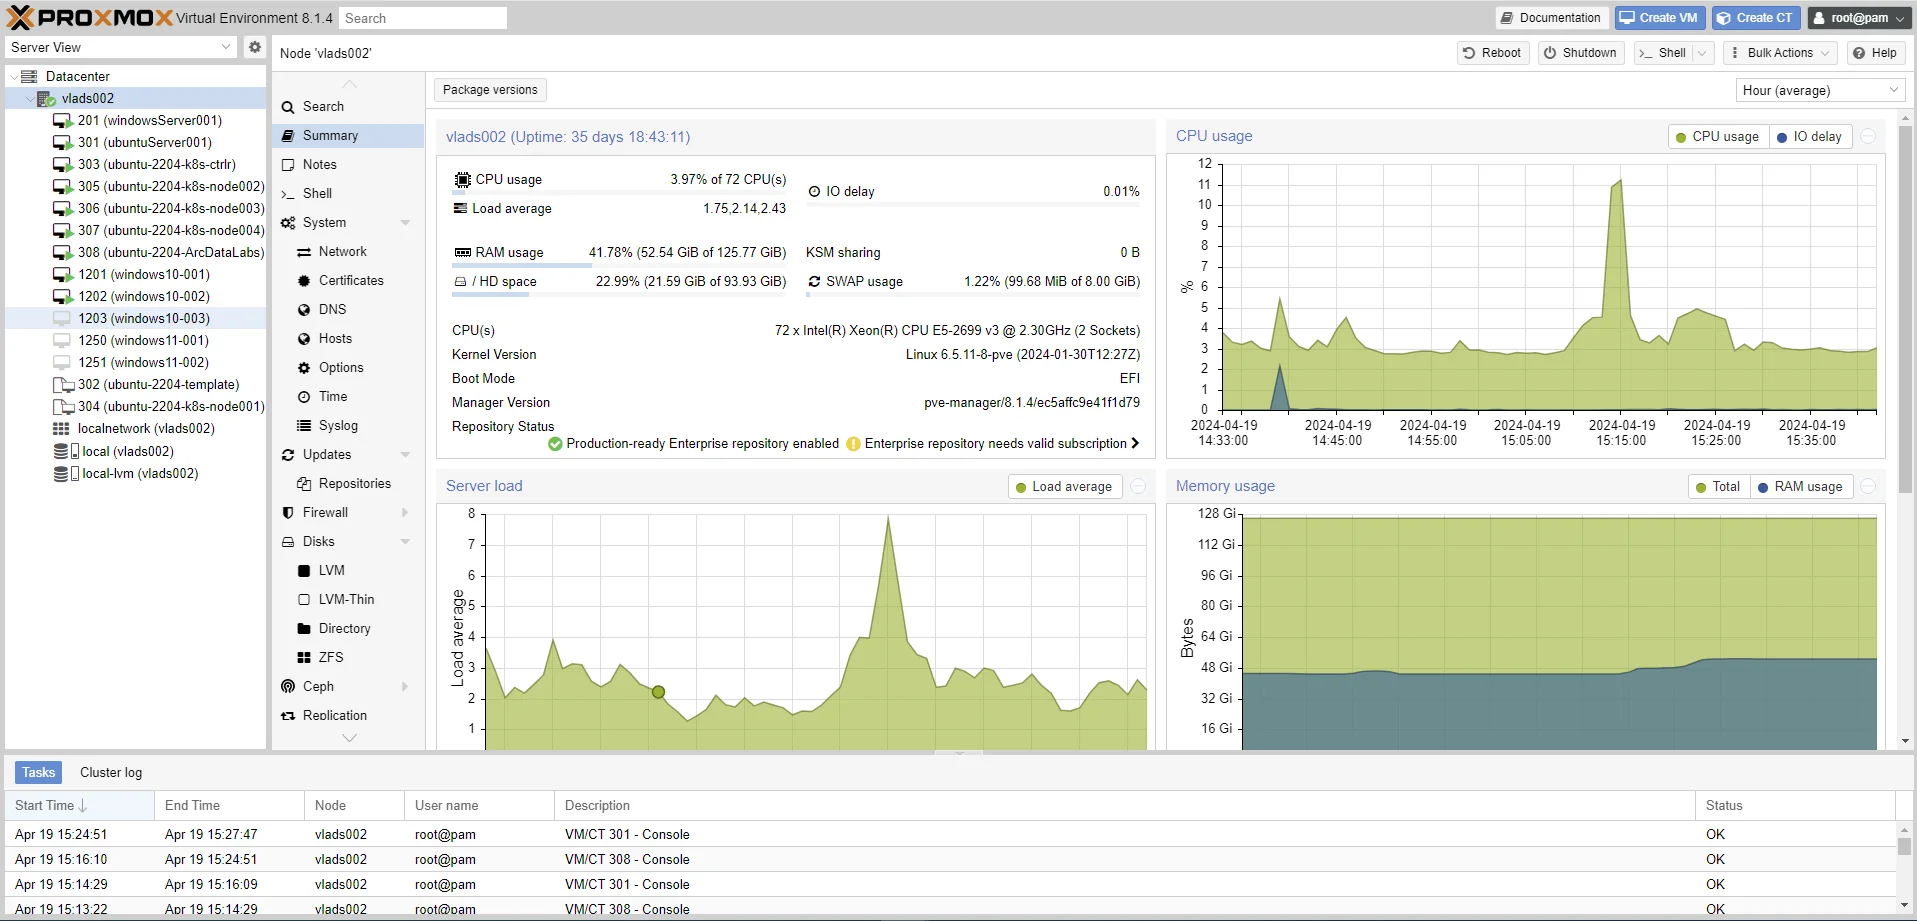
To partition my hardware into different VMs, I’m using Proxmox - an open source hypervisor that allows me to run different VMs - Linux, Windows, Server variants, etc. Here’s an image of the current VMs I’m running in case you’re curious:
Software Overview - Operating System (Linux)
This shouldn’t be critical and you should certainly set your own parameters on the operating system, but here’s what I have configured for this specific virtual machine:
- 4 Cores of CPU
- 8GB RAM
- 128GB Hard Disk Space
Here’s a Summary of the VM within Proxmox
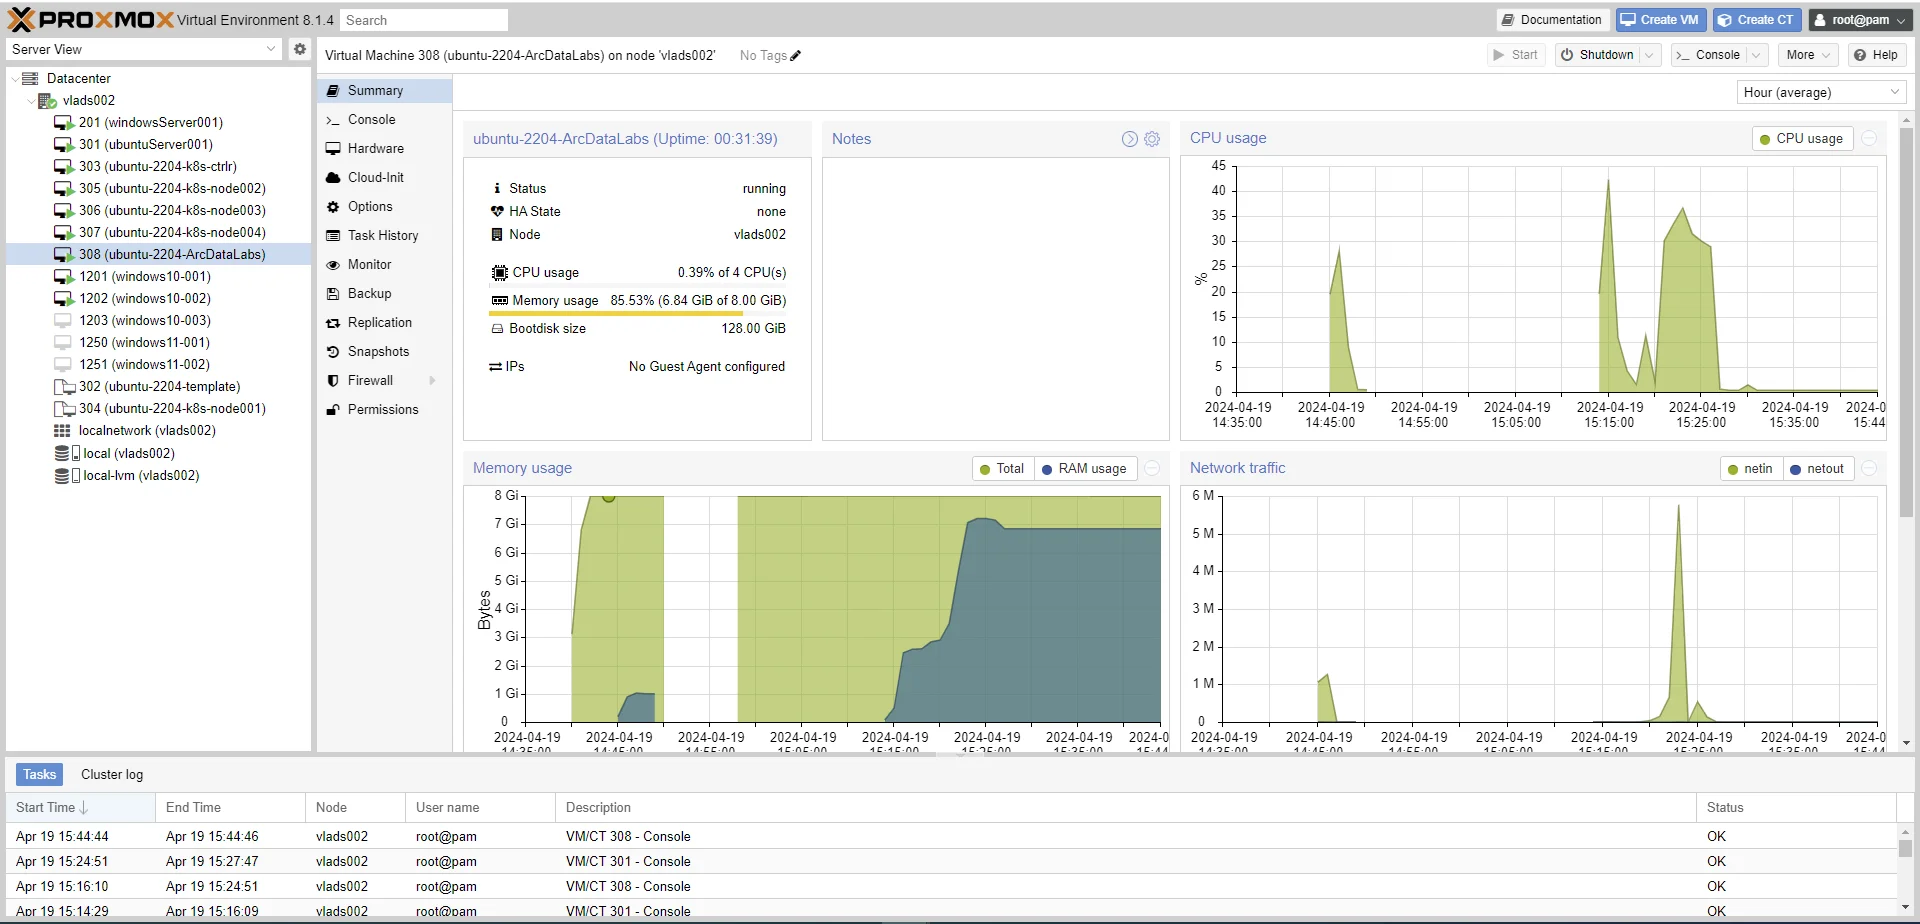
You’ll notice that in Proxmox, you can view the IP address of every VM via the “Guest Agent” under the Summary tab. For this specific machine, you can see the “No Guest Agent configured”
It’s important to note that we’re going to be configuring a fresh installation of Linux, which means that we’re going to include some baseline commands to ensure that everything is up to date, the right parameters for exposing the IP addresses are enabled, etc. In your instance, you might only be changing the IP addresses and the other settings may have already been set to what you need.
Configuring Network Settings for Linux
Depending on your hardware / software, the first step is to determine what are the current network settings of your Linux instance. We can do so by running the following command:
Note that I have access to the terminal via the Proxmox interface. You’d be either running this directly on your machine or via an SSH client (Ex: PuTTy)
Here’s the response I get when I run the command:

Notice that the IP address has been set by DHCP for my VM and is currently 192.168.0.105. I can easily verify that this is in fact correct by issuing a ping command over my private network from my Windows PC:
Here’s the response:
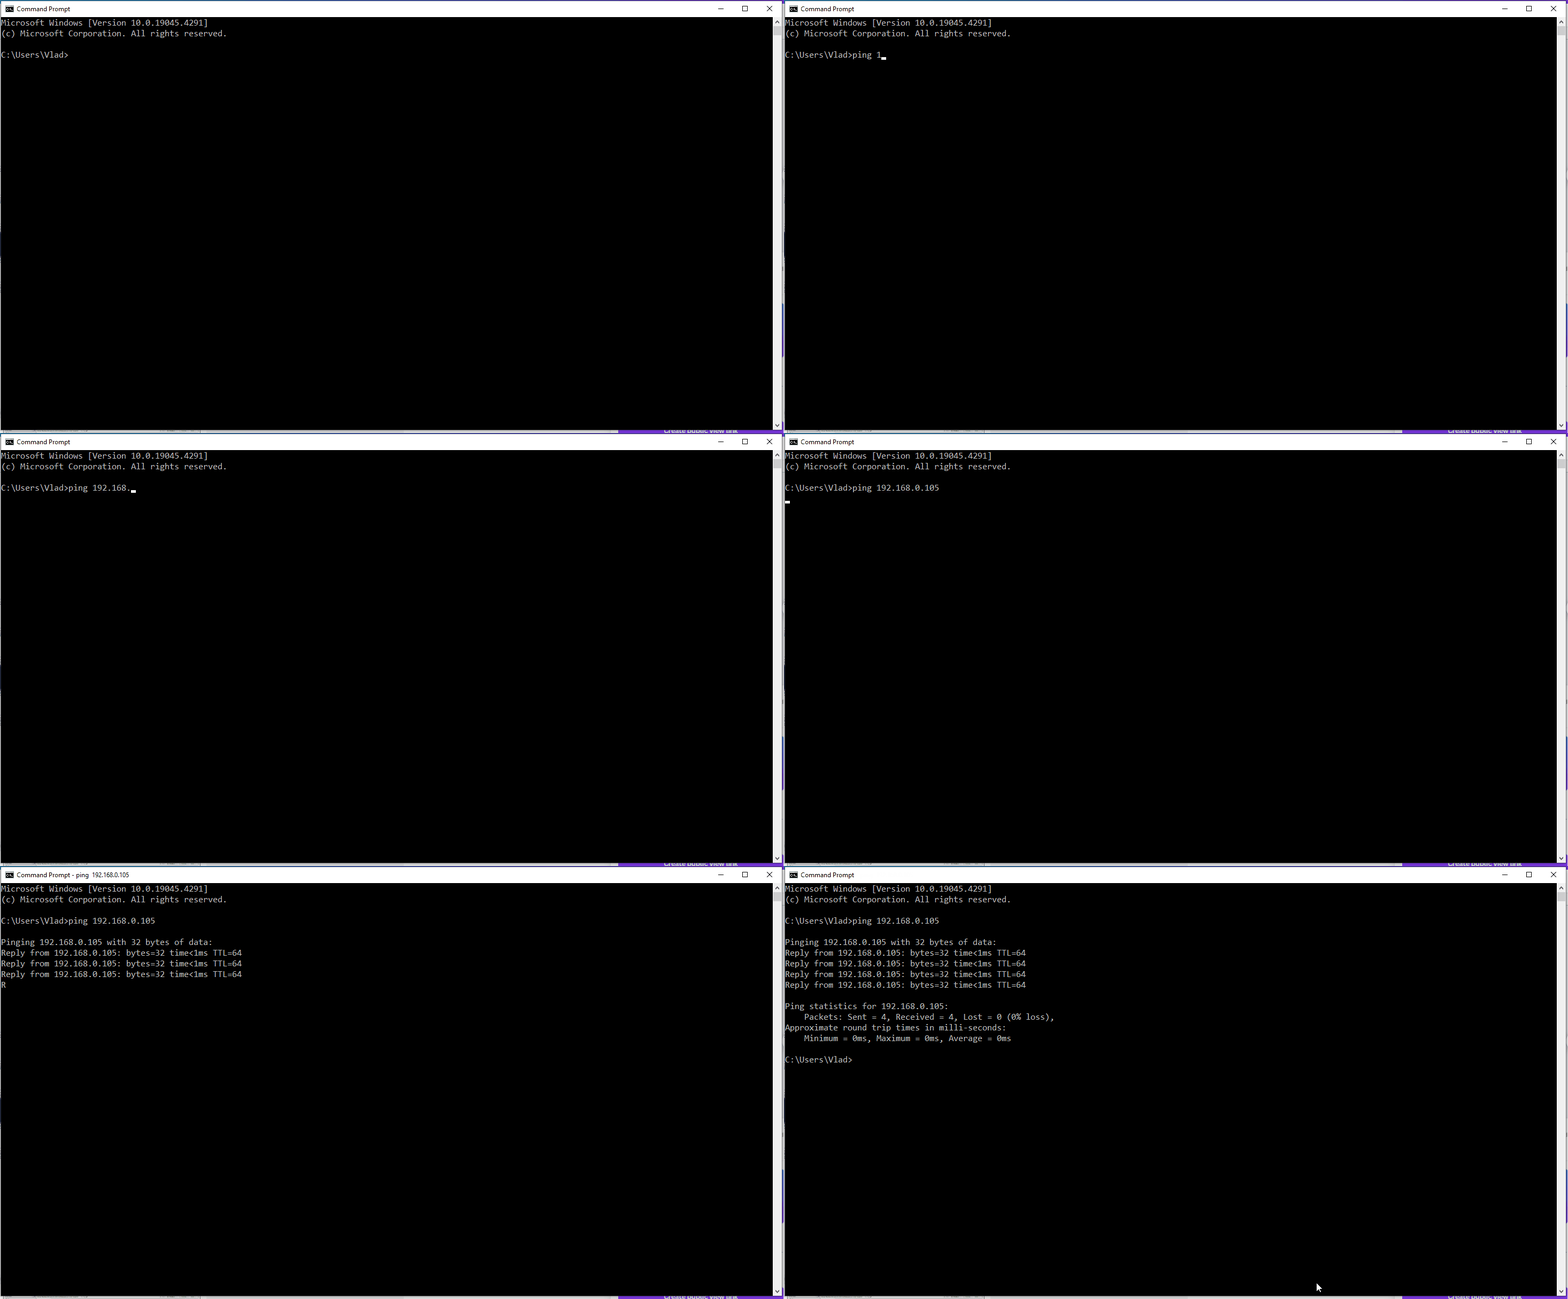
At this point, we can choose to keep using the native / Proxmox CLI to configure the instance, or we can connect via an SSH client. Note that depending on your configuration (Ex: if you’re using a cloud provider) you may have an easier time to connect to this instance via SSH.
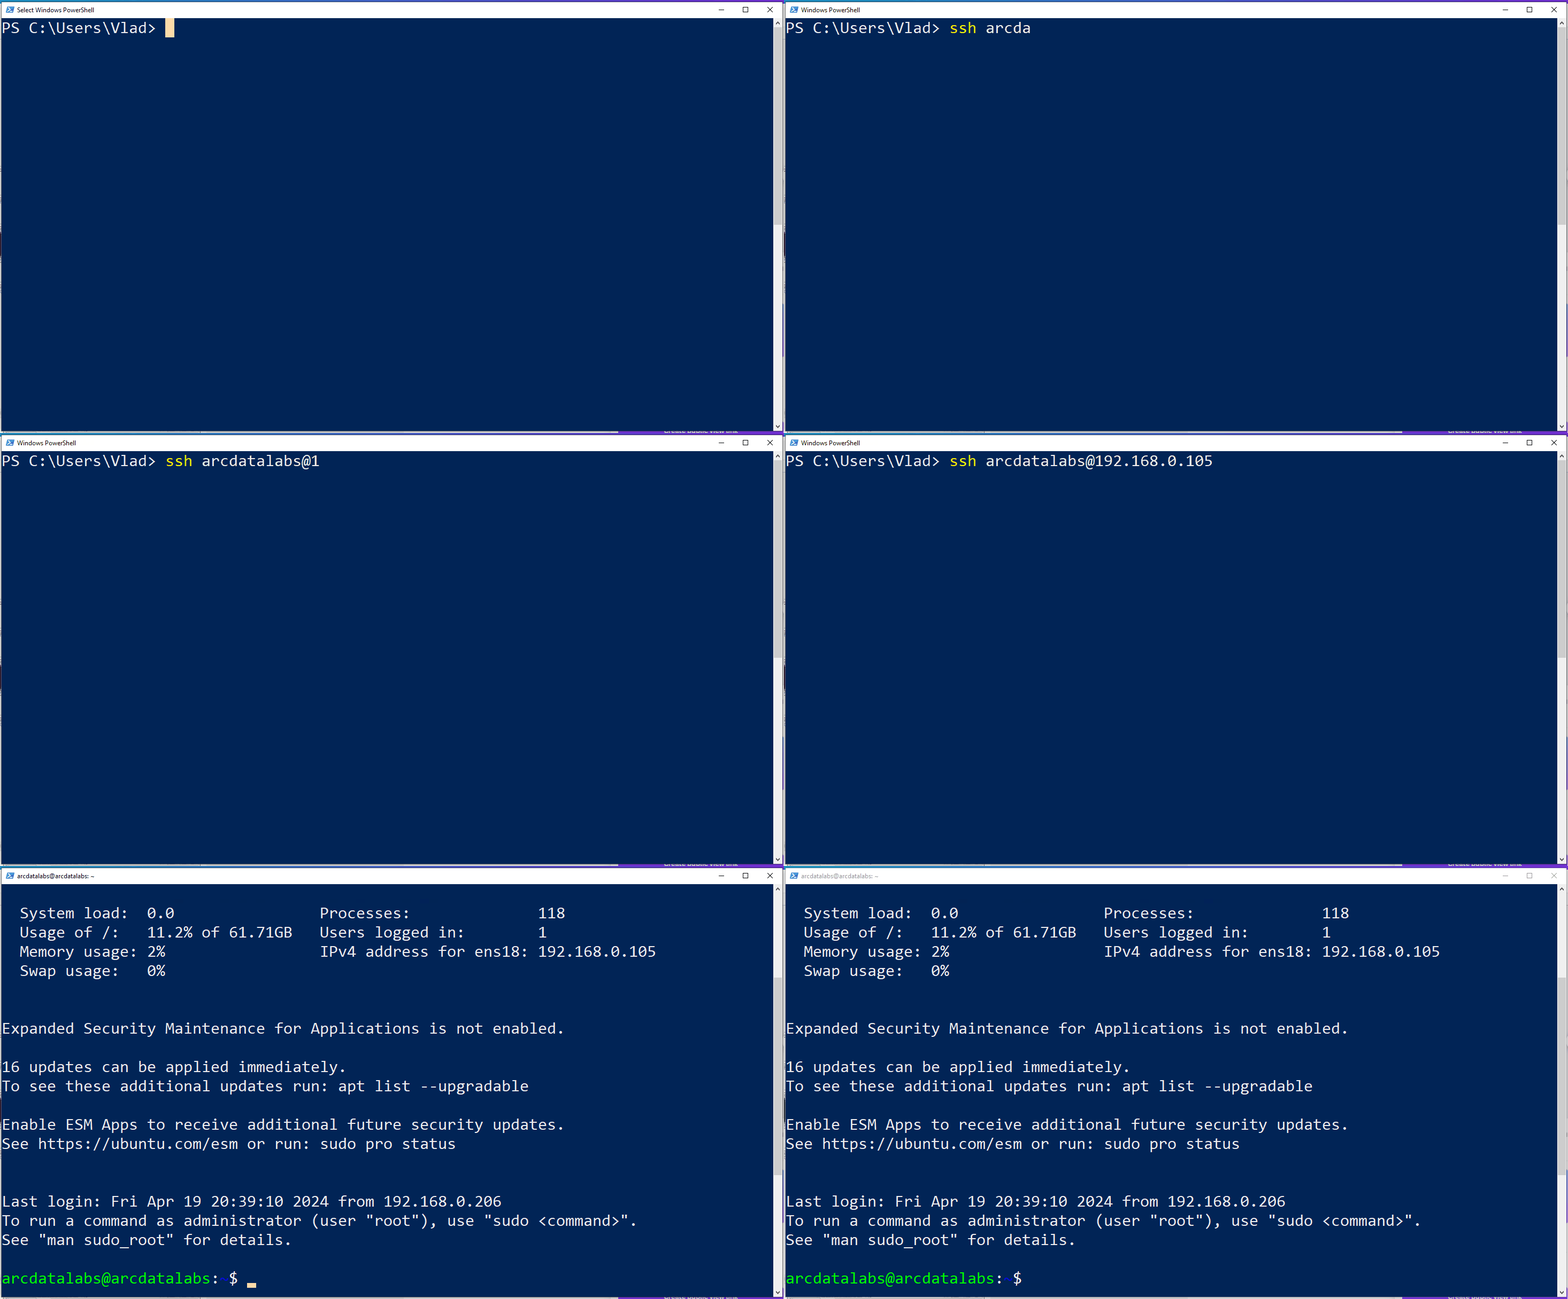
Connect to the Linux Instance via SSH
On Windows, you can use PowerShell, while on Mac or Linux you can use Terminal. The command to connect to your Linux instance via SSH is the same across all those operating systems:
Initial Configuration of Linux Instance
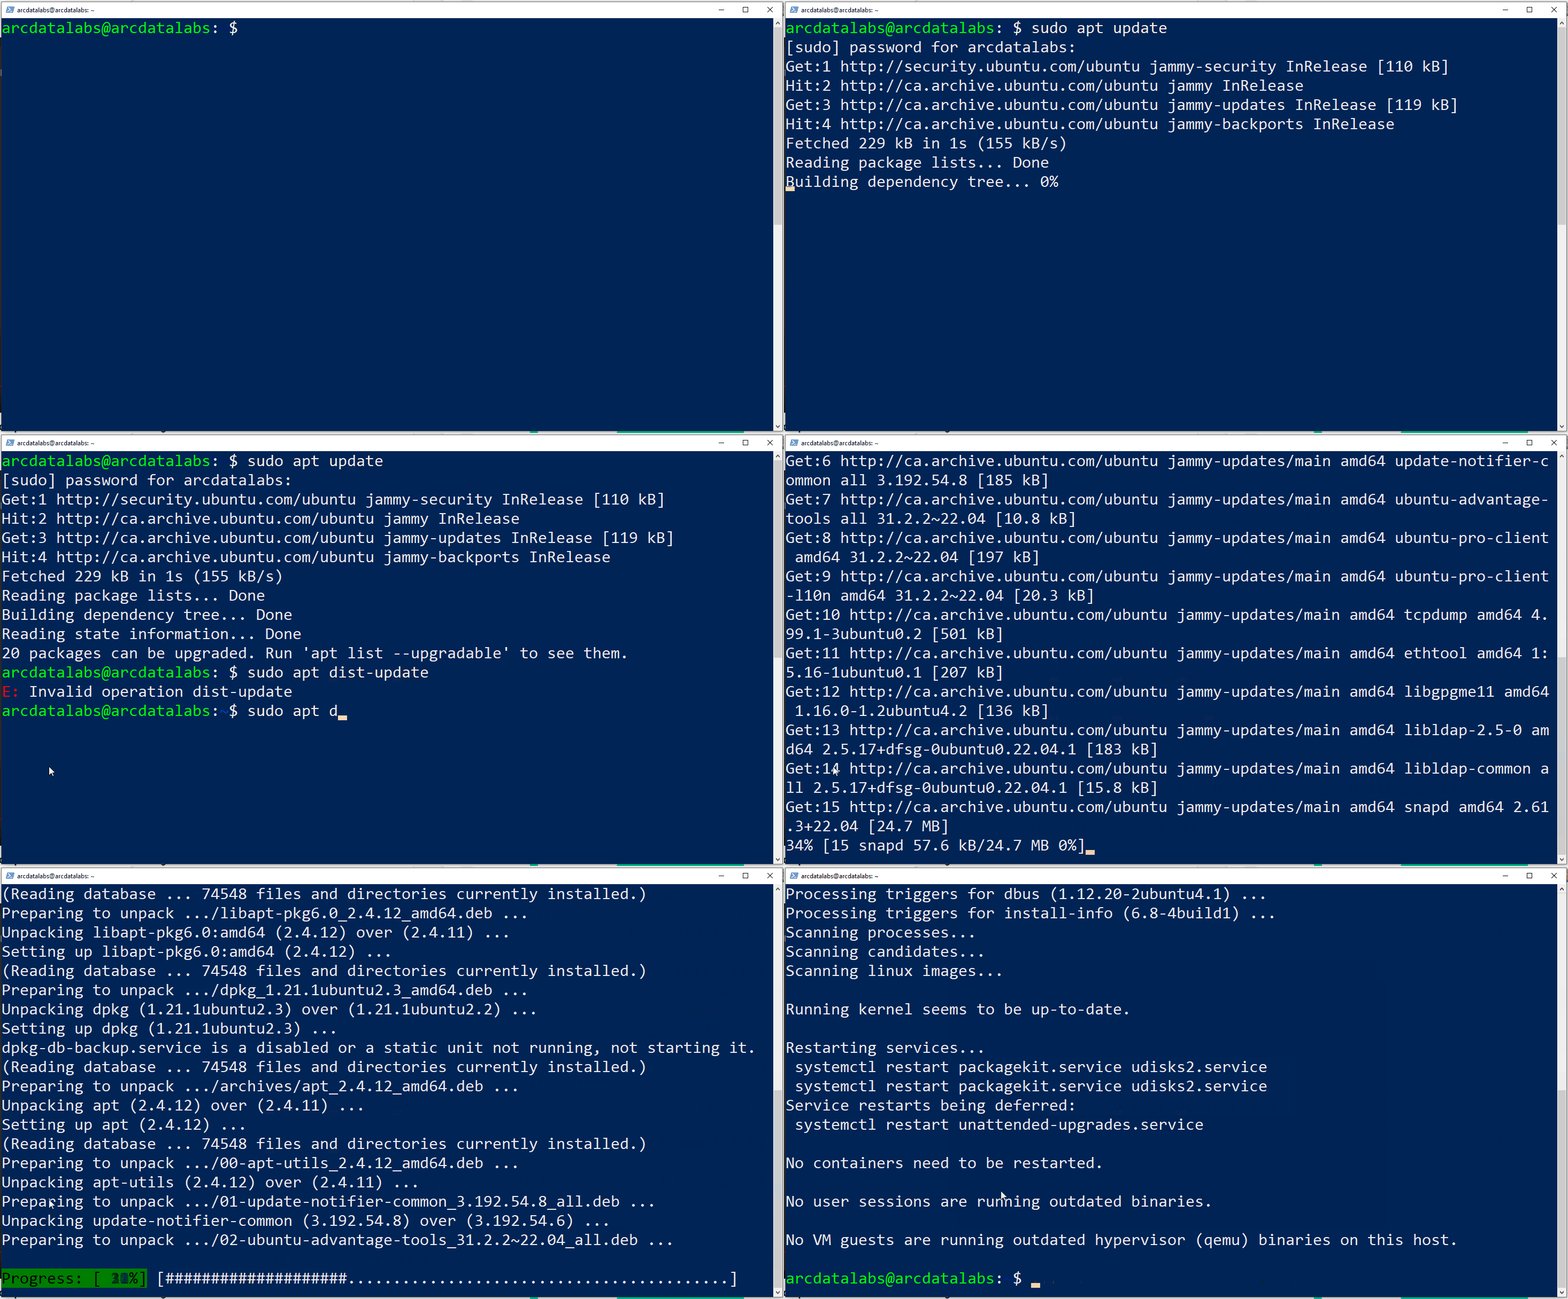
At this point, we can make sure that the instance is running the most up to date version of Linux and that all the patches have been installed. Run the following commands before doing anything else:
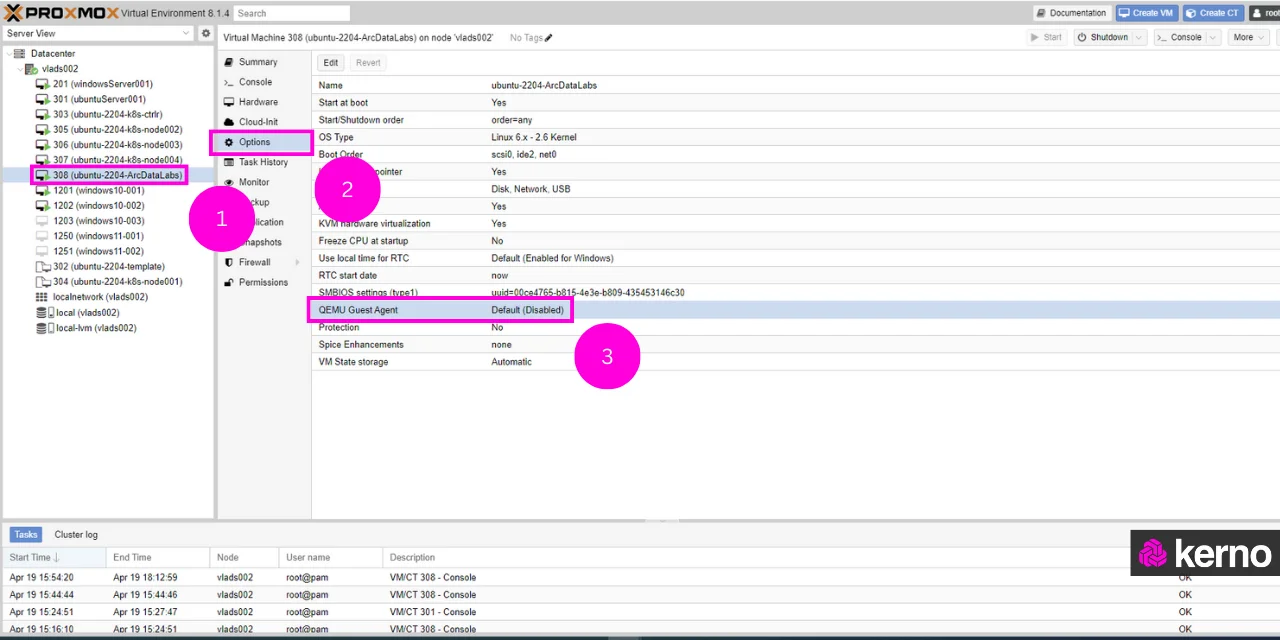
We need to enable the QEMU Guest Agent via Proxmox through the UI. Here are the basic steps to get that done:
1 - Navigate to the VM via the left hand side menu.
2 - Choose “Options” for the VM.
3 - Double-click on the “QEMU Guest Agent” option.
4 - Check the “Use QEMU Guest Agent” checkbox.
5 - Click on “OK”.
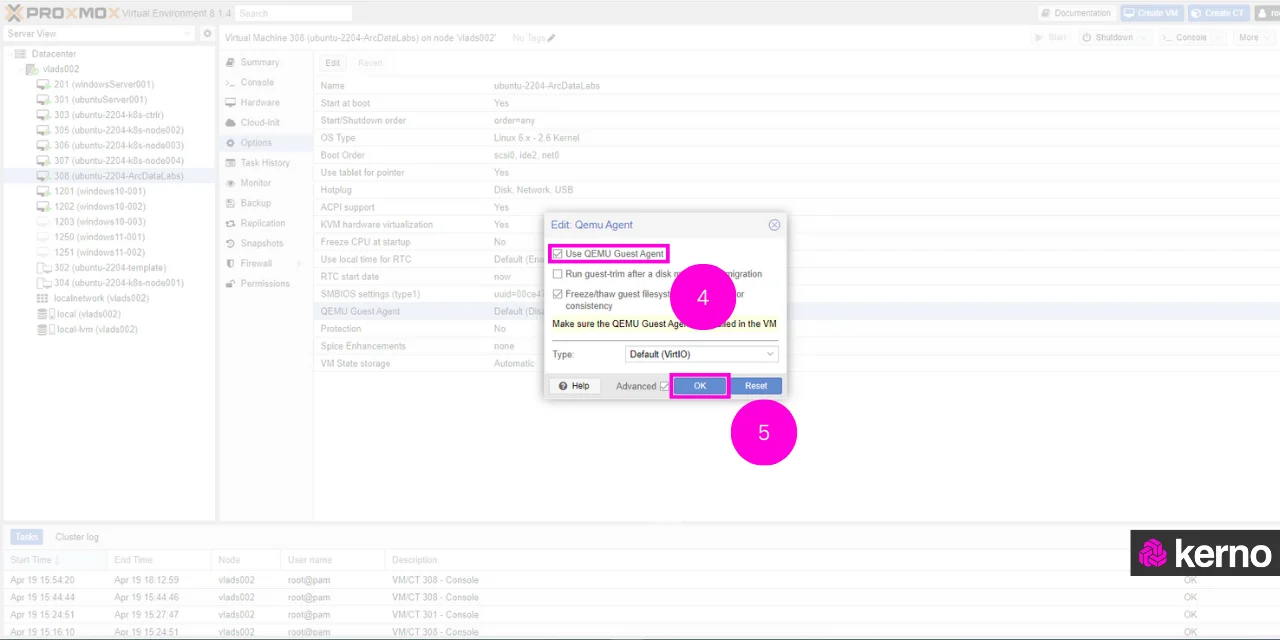
Note that you’ll need to reboot the instance for the changes to take effect. You can do so via the Proxmox UI. You’ll need to wait for the instance to reboot before re-accessing it via ssh.
The next step is to install the actual agent onto the instance using the following command:

Let’s start the service by using the following command:
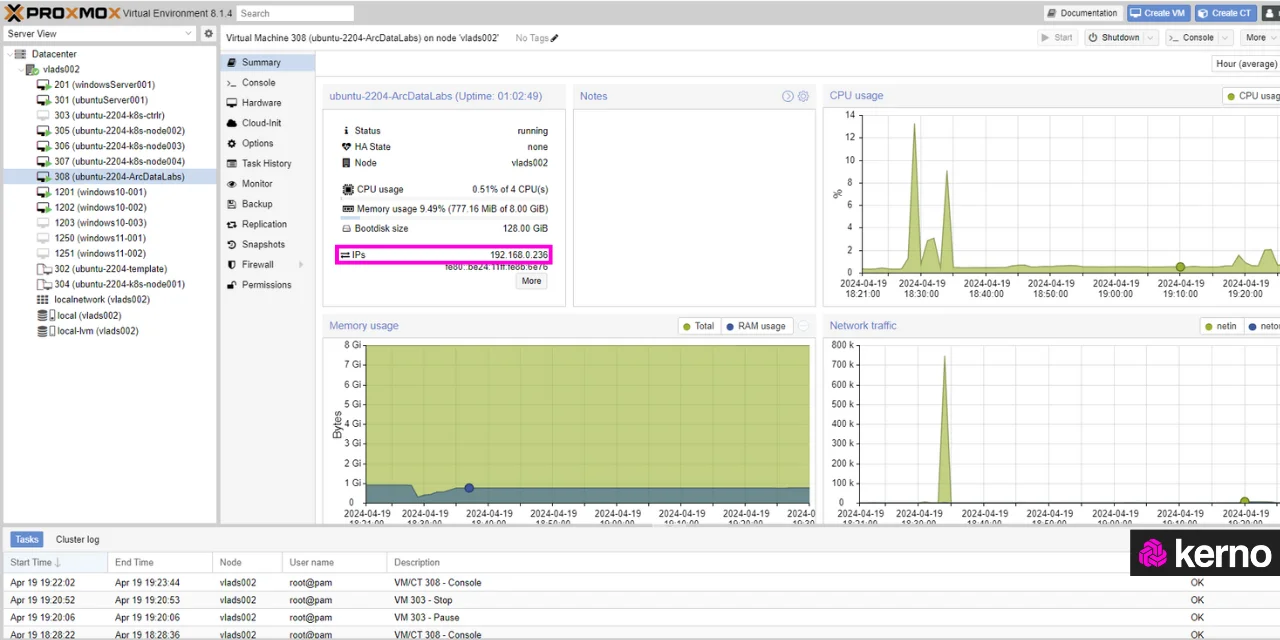
If you’ve done everything correctly, you should now be able to see the IP address of the instance under the Summary section in Proxmox as shown below:

Note that up until this point, we haven’t changed the IP address. We’re simply seeing the DHCP address that was assigned to this instance by the gateway.
Setting a Startic IP address of the Linux Instance
Now that we’re able to see the IP address of the instance and to access it via ssh, we’re able to change the configuration files of the VM to set a static IP address. Let’s get that accomplished in this section.
Access & Modify the Network Config Files for Linux
At the root directory of your instance, you won’t see any files by running the “ls” command spending on your permissions which typically shows all files at that level. However, the config file for a Linux instance can be found under the “/etc/netplan/” directory. It can be accessed by running the following command just as you would to navigate to any other directory:
At this location, you should find a single file by issuing the “ls” command. That file should be 00-installer-config.yaml
The file contains the configuration of network settings for this Linux instance. Note that you may want to back-up the file by creating a copy before proceeding with the next steps. We’ve done this numerous times, so we’ll skip those steps!
The easiest way to access and modify the contents of the file is by running the following command via the same terminal we’ve accessed the instance:

In this file, we’ll need to change the DHCP setting to the static IP address of our choice. Note that this isn’t a networking course; understand that you need to give your router / switch the right settings for this address to be accessible after it has been changed. That being said, here’s the set of settings we’re going to use in our file:

To save the changes, you can use the nano shortcut “Control + O”
To exit the editor, you can use the nano shortcut “Control + X”
At this point, you should have made the necessary changes to set a static IP on your Linux instance.
Warning: applying the following command will disconnect you from the terminal you’re currently using unless you’ve set the same IP address (unlikely). Once you issue the command, you’ll need to access the instance at the given IP address to proceed further, install software, etc. You’ll also break any direct connections that you may have on this instance.
At this point, if you go back to the Proxmox “Summary” section, you should see the new IP address of the instance. As mentioned above, you should also be able to access the instance via the new address.
Setting a Second Startic IP address of the Linux Instance Running on Proxmox
As I had mentioned in the introduction, I’m running Proxmox on a Dell PowerEdge R730xd server. The hardware features 4 distinct ports on the back plane - each one can be used to connect to the VMs that are virtualized on Proxmox.
In this section, we’re going to discuss the steps needed to set a second IP address for the same Linux virtual machine we’ve configured above. My goal (which may not be something you need) is to connect from this Linux machine to the public subnet, and the private one. In other words, there’s no bridge between the two and only the applications that run on this VM will be able to access the private network.
The first step is to add the network adapter in Proxmox. Before we add an adapter, let’s validate the current settings of the VM. We can do so by clicking the “More” button on the Summary page as shown below:
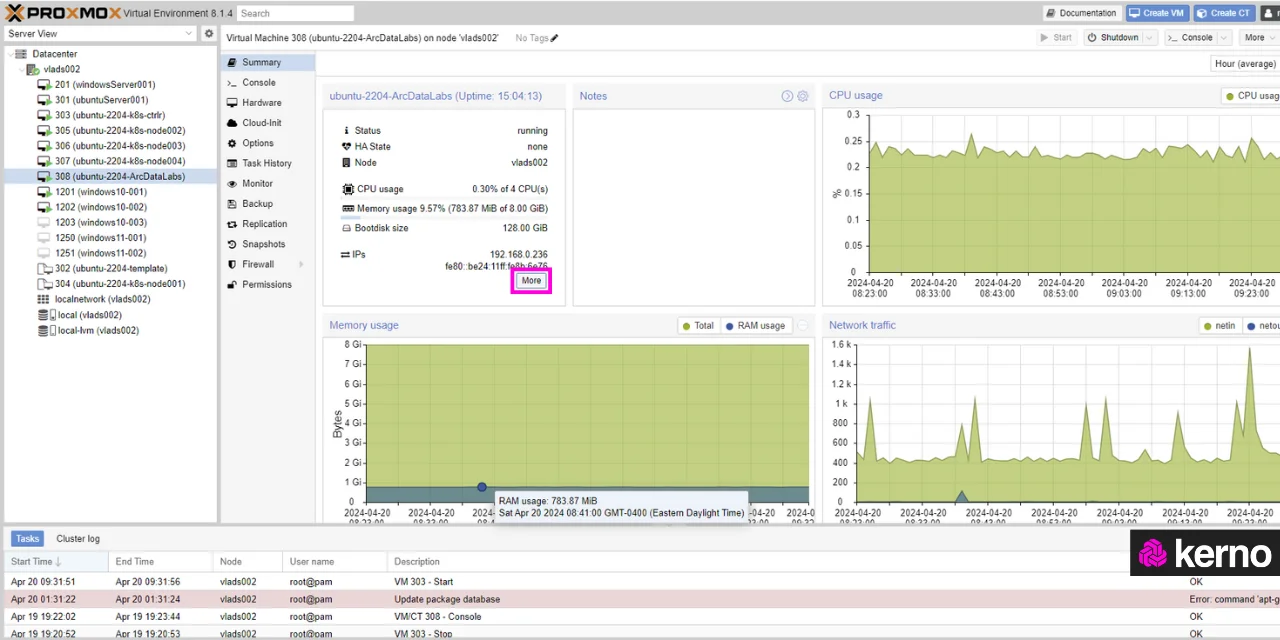
A small pop-up window lists all the available adapters for this VM. Notice that as we had done above, there’s an adapter set to a static IP address of 192.168.0.236 as shown below. Again, this isn’t a networking tutorial, but you’ll also find a MAC address of the hardware, as well as the IPv6 address if it has been set.

Adding a Network Adapter to a Virtual Machine in Proxmox
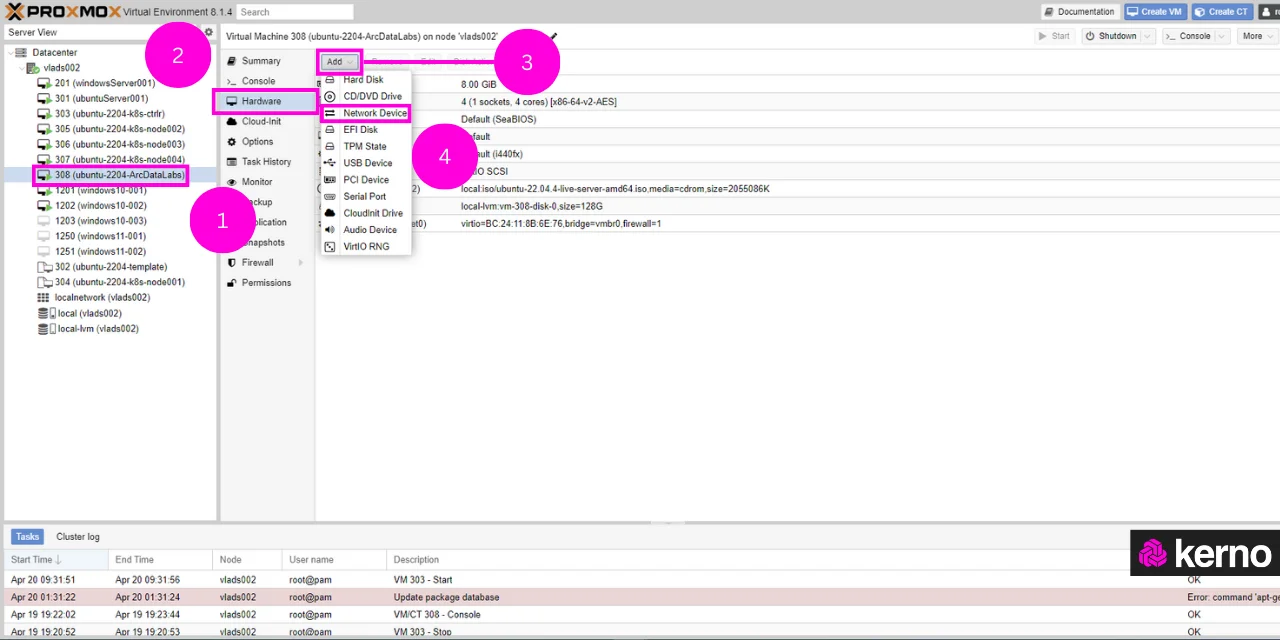
All the virtualized hardware components are listed under the Hardware section for each VM. We can add the network adapter by following the next steps:
1 - Navigate to the VM you want to add the adapter to.
2 - Navigate to the Hardware section
3 - Press on “Add”
4 - Choose “Network Device”
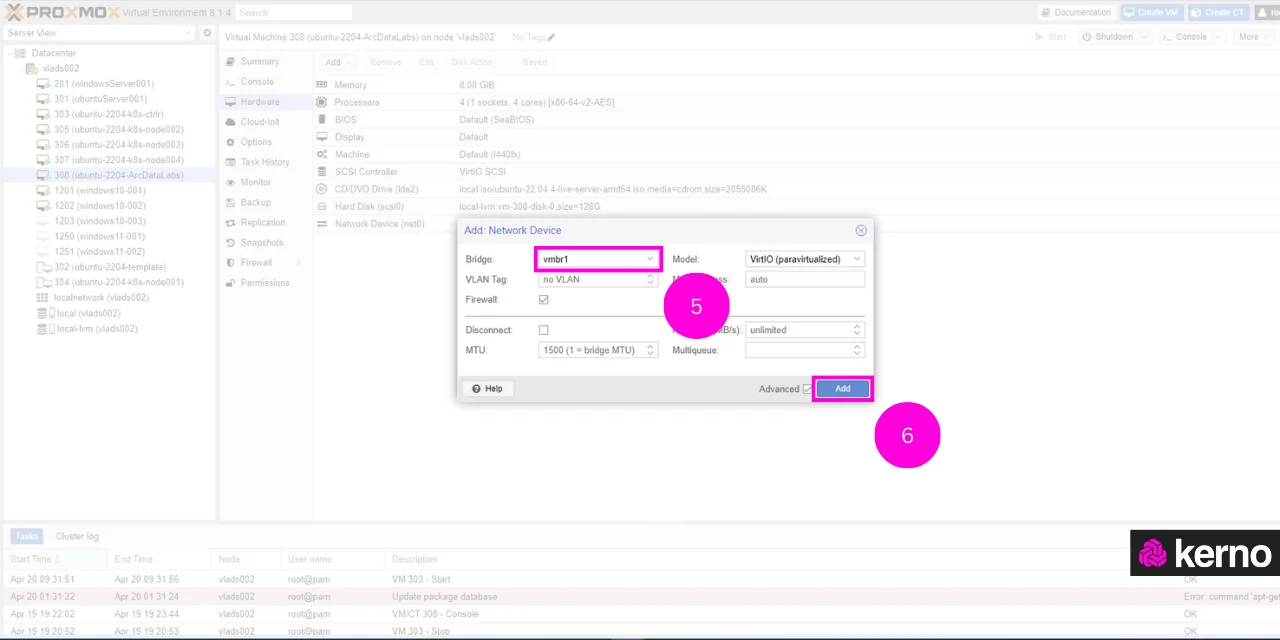
5 - Select the Bridge which is what you need to configure in Proxmox for your network adapter.
6 - Click on “Add.”
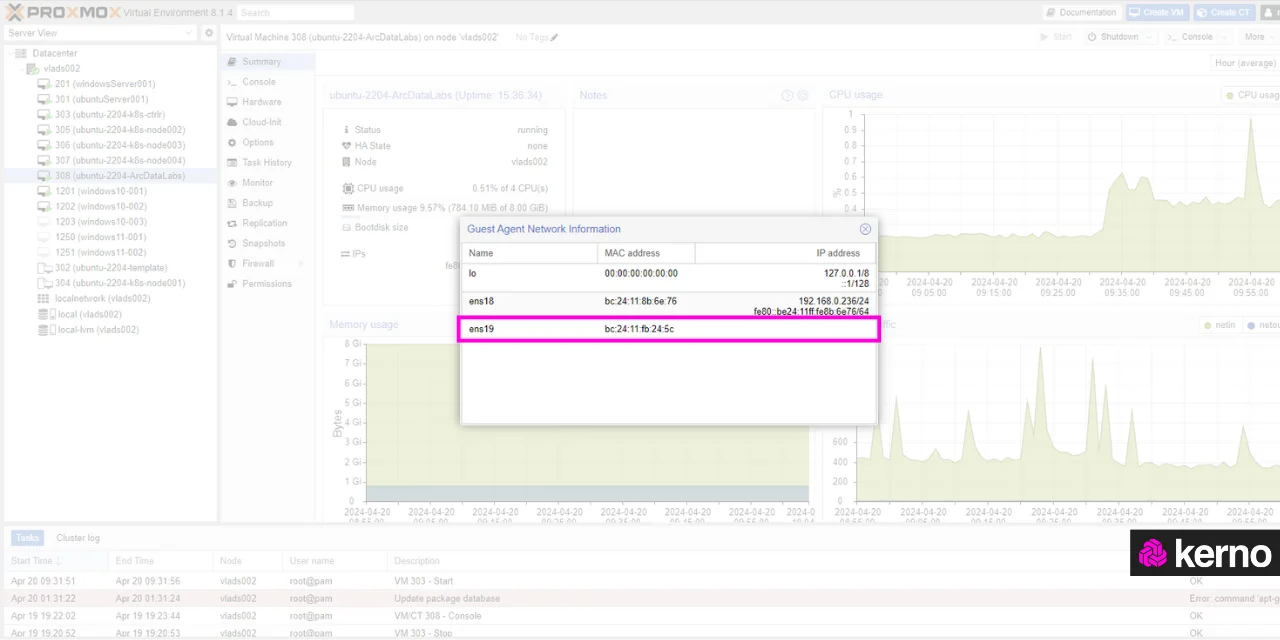
At this point, we’ve added the adapter, but we haven’t configured it in the Linux environment. As you’d expect, it will show up under the Guest Agent Network Information panel, but it won’t have any IPv4 or IPv6 address assigned to it. Here’s what it looks like at this stage:
Configuring a Second Static IP in Linux
The adapter has been added; we now need to configure a static IP address to be used by the VM. As we had done in the past, we’ll open the network configuration file and add the adapter into it with the desired settings. Here’s what the file will look like now:
An important reminder - In YAML files, indentation matters. If you miss a space or tab, the system will give you an error.
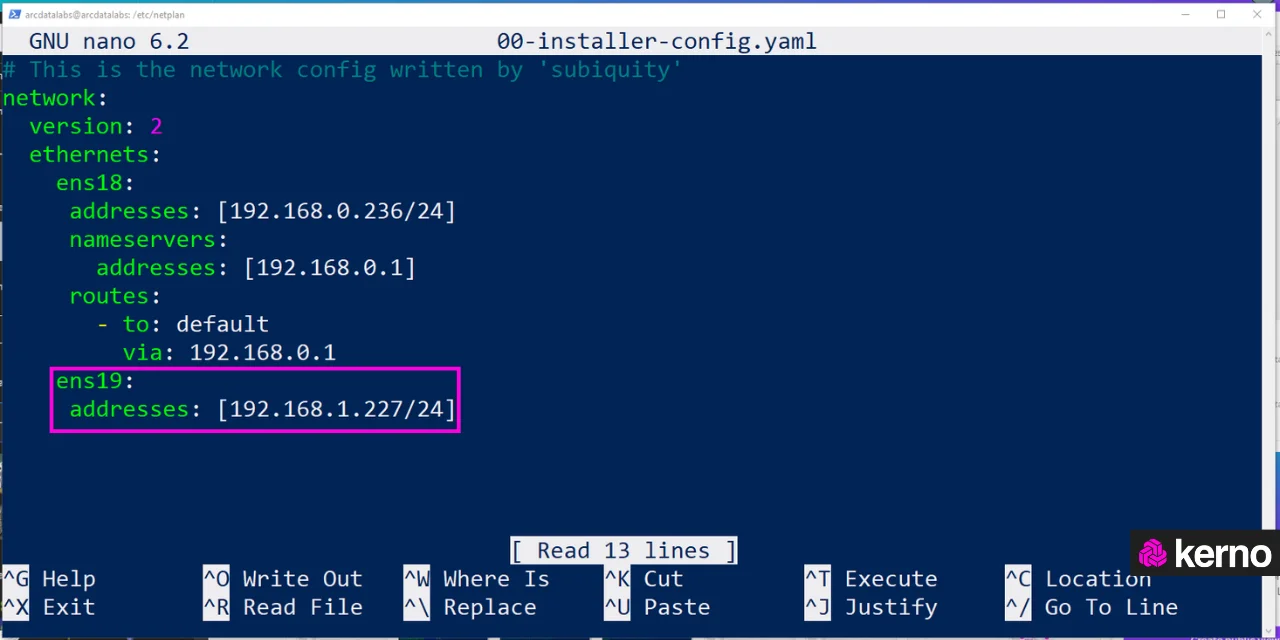
Once finalized, just as we had done before, you may use the “Control + O” and the “Control + X” shortcuts to save and exit.
At this point, you can issue the same command as we did before to push the settings to Linux:
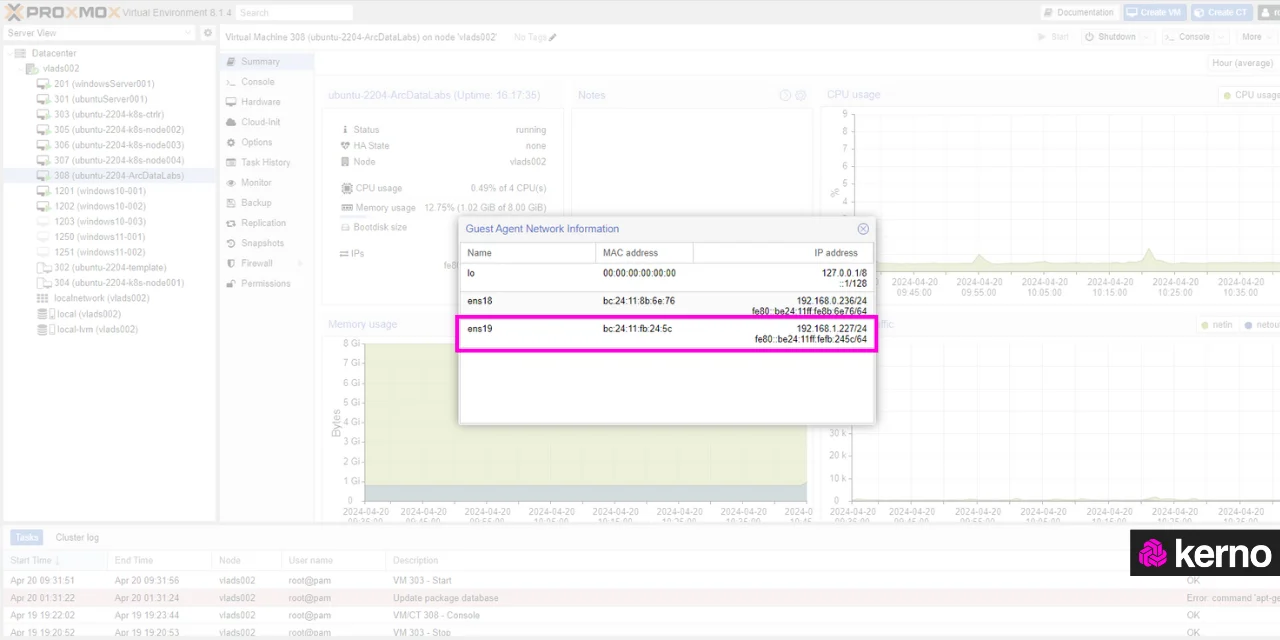
You’re not going to be disconnected at this point since we’ve added a second IP addresses and the one we’re connected through wasn’t changed. If you go back to the Proxmox interface, you’ll find that the new adapter should now have an IP address under the Guest Agent Network Information tab as shown below:
Conclusion on Setting Static IP Addresses on Linux and Proxmox
I wrote this tutorial as I’ve had to go through these steps multiple times and I’ve noticed that there aren’t many materials on how to get this done properly via both environments - Linux and Proxmox. My goal was to set multiple IP addresses based on the hardware interface I’m using; I’m looking into other solutions (proper managed switch) to accomplish the same.
In either case, we’ve covered all the steps in a lot of detail on how to get this done, tested the connection, and made sure that everything works on real hardware / software.
