
Guides
Mastering Pod Deletion in K8s: A Guide to Using kubectl for Removing Pods
A guide to pod management in Kubernetes, covering how to delete and remove pods with kubectl and what happens to the workload when you do.

In this comprehensive guide, we delve into the essential task of pod management within a Kubernetes (K8S) environment, focusing specifically on how to delete or remove pods using kubectl. This article is tailored for those working with clusters running on AKS (Azure Kubernetes Service) and offers practical examples to enhance your understanding. We’ll explore various scenarios where you might need to use ‘kubectl delete pod’ or ‘delete pod kubectl’ commands, such as manually scaling down your cluster for troubleshooting, removing pods from a specific node, or completely clearing pods off a node in preparation for maintenance. Understanding the nuances of ‘kubectl remove pod’, ‘delete pods kubectl’, and ‘k8s delete pod’ commands is crucial for efficient Kubernetes cluster management, and this guide aims to equip you with the knowledge to handle these tasks with confidence.
kubectl Delete Pod
You should start by issuing the following command to retrieve the names and status of all the nodes running in the current cluster.
kubectl get nodes -o wide
You should also retrieve the pods running in the cluster by issuing the following command:
kubectl get pods -o wide
Note that you may not have pods in the current namespace; to locate the pods in a different namespace, you’ll need to issue the following command:
kubectl get pods -o wide -n "namespace_name"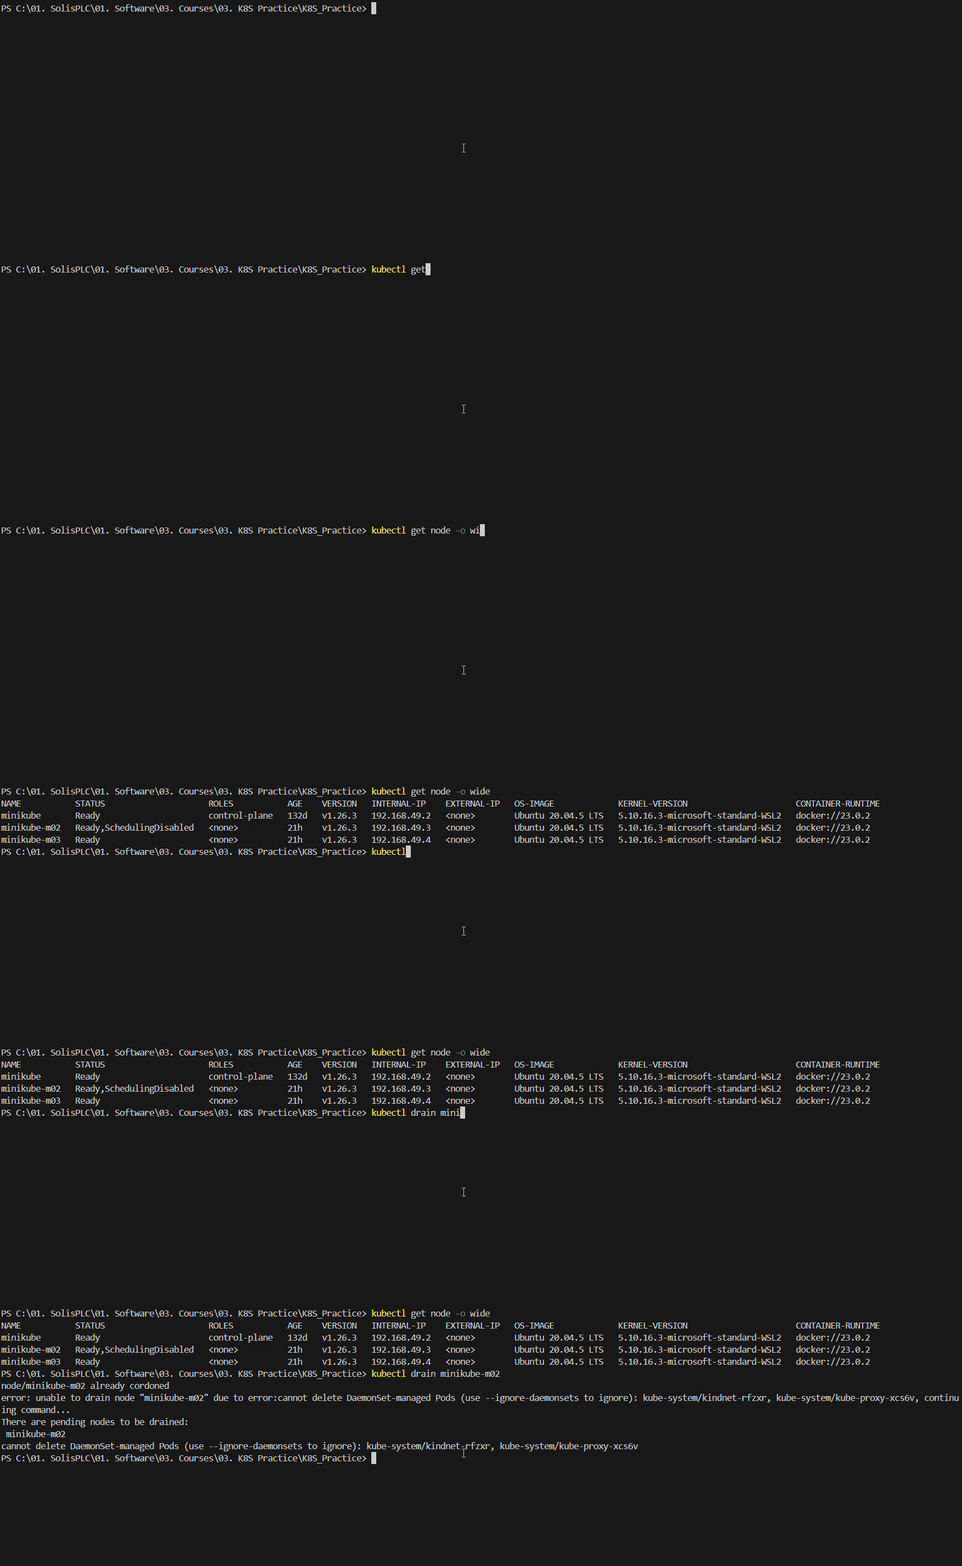
The code above displays a few things.
- We’ve identified three different nodes within the “default” namespace.
- We’re seeing no pods running within the “default” namespace.
- We’ve identified two pods running within the “kubernetes-dashboard” namespace that comes with minikube.
It’s essential to go through the steps above as engineers often remove the incorrect pod within the wrong deployment, namespace, or node.
kubectl Drain Node Command
At this point, we’ve identified some of the nodes and pods we have within our deployment and across various namespaces. One of the ways we can delete pods within a node is by using the “kubectl drain” command as shown below:
kubectl drain "node_name"Note that we’re getting an error message that reads “cannot delete DemonSet. Here’s the workaround that ignores DemonSets in the drain process:
kubectl drain "node_name" --ignore-daemonsets
So what actually happens with the Node?
When you issue the drain command, Kubernetes will move the pods currently running on the node onto the next available node. This is the core functionality of Kubernetes and the reason why, in most deployments, you’ll see multiple nodes dedicated to the same application or task. Note that it’s possible that the deployment will scale up or down the number of nodes that can run a specific service. Therefore, you may not have a currently available node to migrate the pods.Once the above it complete, the node is put into a “maintenance” mode that prevents any new pods from running on it.kubectl Uncordon Node Command
Once a node is “quarantined,” no pods will be allowed to launch on it. You can restart the node by issuing the following command:
kubectl uncordon "node_name"
Delete a Single Pod in KubernetesIt’s possible to delete a single pod via the following commands that includes the namespace:
kubectl get pods -n "namespace_name"kubectl delete pod “pod_name” -n "namespace_name"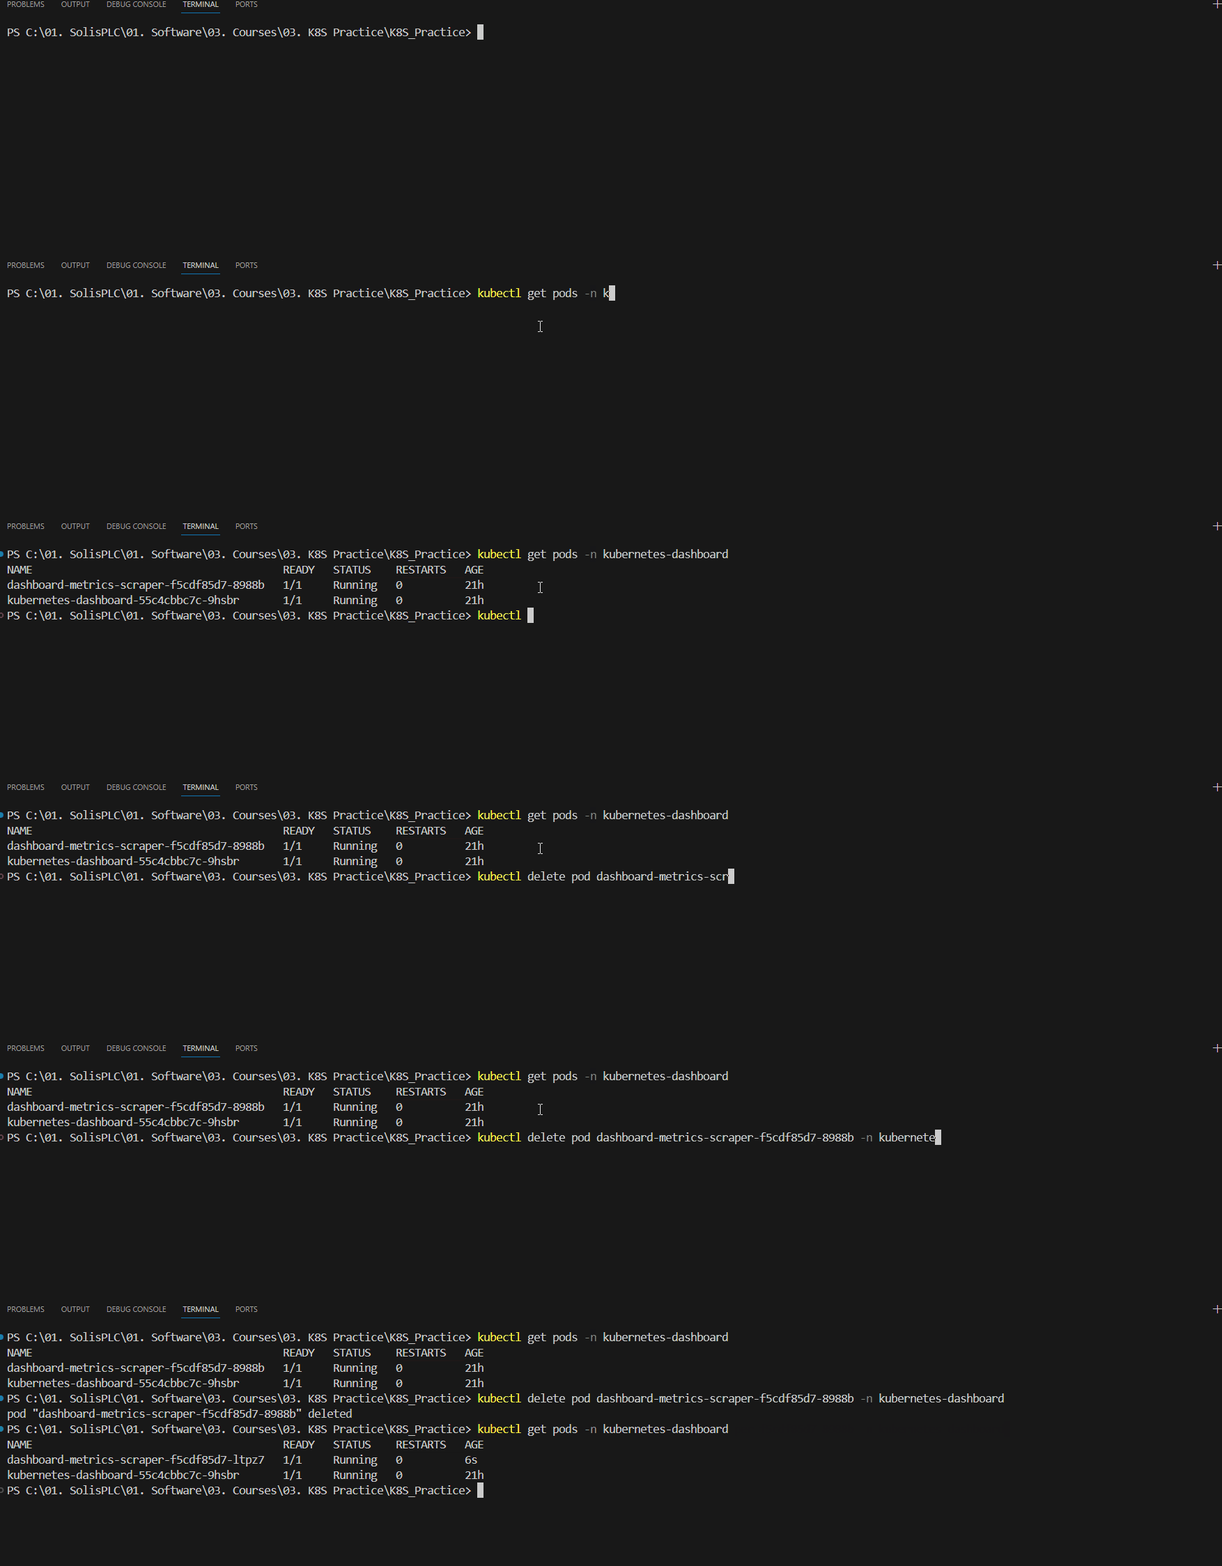
Conclusion on Deleting Pods in Kubernetes via kubectl commands
In conclusion, mastering the use of kubectl for pod management is an essential skill for anyone working with Kubernetes, especially in environments like AKS (Azure Kubernetes Service). Throughout this article, we’ve covered a range of commands and scenarios, from kubectl delete pod to delete pods kubectl, providing you with the tools and knowledge needed to effectively scale down, troubleshoot, or perform maintenance on your Kubernetes clusters. Whether you’re dealing with a single pod removal using delete pod kubectl or managing multiple pods with kubectl delete pods, the insights and examples provided should help you navigate these tasks with ease. Remember, efficient pod management using commands like kubectl remove pod and k8s delete pod is key to maintaining a healthy and responsive Kubernetes environment. Keep these techniques in mind as you continue to develop your Kubernetes expertise and manage your clusters more effectively.
Try Kerno on your codebase
Kerno tests and verifies every backend change against your real app and dependencies, so your team catches runtime bugs before they ship.